Our Raison D'etre

Kitchen Wanderings is a spin off of my mostly travel oriented/foodie/mommy blog The Mediocre Wanderer.
With post titles that sound suspiciously like a B movie or a spy action thriller novel, it reflects two of my greatest passions: writing and cooking.
Here's to a life full of flavor and a world of great meals, great companions, great recipes and meal ideas that you could recreate in the comfort of your home, easily.


Wednesday, June 28, 2017

Weighing In On The Cinder Precision Grill


Cinder was a concept precision grill that my husband ran across in an article at CNET.com. 


The idea of slapping on meat/fish/chicken and what have you on a grill that takes care of the temperature, cooking time and keeps it warm after was something he thought a busy mom like me, would appreciate. He was right of course.


The grill can also be controlled via an ios app. It comes with presets, asking you what you want to cook and gives you instructions on how to improve what you just cooked.


COOKING WITH IT:
I tried it out on hubby's Father's Day steaks. Used ribeye. Selected how I wanted it done via the app (medium rare).


After reaching the desired temperature and cooking time, it told me to sear the meat. It gave me detailed, yet simple instructions on how to do that. And voila! Perfect steaks for my perfect man.

Using it was seriously easy. Cooking was fast as the grill could reach 400 degrees Fahrenheit in less than 2 minutes (when I had to sear the steaks).

CLEANING AND STORAGE:
Cleaning it up was also quite easy. As with electronic appliances, one does not soak the Cinder Precision Grill. I had to wait for the built in fans to cool the grill, before I wiped it down with paper towels. As fast as it heated up, the thing took a good hour before it was totally cool enough to wipe down.

the catch basin is on the left bottom side of Cinder. Just pull, empty and rinse!

On the plus side, all the grease from the grill drizzled into a catch basin, making it even easier to clean. The catch basin is totally washable.

As for storage, it's the size of a scanner, just chunkier and bigger. It's also quite heavy, like a bunch of your your cast iron pans. It's going to be tough to just stick it in a shelf or pop it in a drawer. This baby was meant to lie on your kitchen counter, forever (thanks to m growing collection of huge kitchen gadgets, our kitchen is in the process of being renovated).

PRICE:
The Cinder Precision Grill is meant to retail at $500 (US) but since we got ours via pre-order, ours cost around $200.

THE LOWDOWN:
I love our Cinder Precision Grill. It's easy to use with it's no mess, no fuss cooking. It's beautiful to look at and gets the job done. If you're always on the go, like we are, this gadget can give you some peace of mind as you don't really have to watch your food and worry that you'll ruin it, allowing you to do other things.

I do know how to cook and I do love to cook, so with or without it, I'll still manage to make my family decent steaks, grilled cheese sandwiches and and a whole lot more, all without the benefit of a preset. But now that's it's in our kitchen, I'm glad that I've got a handy dandy helper with the meals that I make.

If you're a novice in the kitchen or have zero cooking skills, this one's a keeper.

On the other hand, if you do have loads of time to cook and know how NOT to burn your food, this might not be the gadget for you. The cost of buying it won't be worth your while.

Another thing, this gadget is being marketed and was therefore bought from the US. Since we're based in the Philippines, I have to use an AVR as the grill only comes in 120 volts.


And that's The Cinder Precision Grill in a nutshell. This is my first non-recipe related post on this blog, that I've re-purposed now for all things related to cooking. 

For more information on the Cinder Grill, visit this link: https://www.cindergrill.com/

From Kitchen Wanderings, here's to a life full of flavor!

Sunday, November 17, 2013

Skewered, Succulent Scallops

had some spicy butter sauce on the side to give the dish some more oomph! to it
Ever since a family friend posted a picture of her scallop dish in social media, Phil has been craving for this particular dish.

I have on more than one occasion, done this. However, I always had to settle for the locally grown, supermarket variety. While they taste good, they shrink significantly after cooking, that one piece seems to be the size of a 25 cent coin.

Luckily, this time around, we found scallops that were U-10 to 12 in size (US grading standard on size, where 12 is the biggest).

This recipe is simple and guarantees that no scallop will be overcooked and rendered tough (similar to all those dumped in the bin by Gordon Ramsey in Hell's Kitchen).

For this recipe, you will need the ff.:

Ingredients:
Scallops               - 24 pieces
Bacon Rashers    - 12 slices, cut in half, lengthwise 
Butter                  - 1/2c, melted (tried it with unsalted and salted butter. Liked the salted butter more. Also, Anchor butter seemed silkier in consistency than the Ambassador French butter. Go local. )
Black Pepper      - 1/2 tsp
Cayenne Pepper - 1/2 tsp
Garlic                  - 6 cloves, peeled and macerated      
Garlic Salt          - 1/2 tsp
Wooden Toothpicks

Preparation:
1. Wrap the bacon slices around the scallops (if frozen, make sure it is thawed well), securing the rashers on to the scallops with a toothpick  
2. In a separate bowl, combine all the other ingredients, adjusting the amount of black pepper, garlic salt and cayenne pepper according to taste.
3. Dip the scallops one by one, coating it with the butter mixture. Save the leftover butter mixture for later, to coat the bacon wrapped scallops, post baking.
4. Preheat oven to 375°. Prepare a baking dish or pan covered with foil or parchment paper for easy clean up. I used a non stick griddle/grill and lined the buttered scallops. Try not to crowd them. This shall allow the wrapped scallops to caramelize and not boil while in the oven. Cook for 15 minutes.
5. Some use thick bacon slices. If this is what you have, you may want to pop em in the oven for 5 minutes, to cook and give the bacon a bit of color. Make sure that it is still flexible enough to wrap around the scallops. We used thin maple bacon (the Purefoods brand works very well). Some of the bacon's oil, scallops' juices along with the melted bacon may let your skewered bacon-wrapped scallops steam a bit. If your oven has a grill function, shift it to that and cook for about 5 minutes more. If not, try to drain out the liquids and bake 5 minutes more. The juice/butter/fat can be used later for a pasta dish.
6. Fresh from the oven, toss the bacon wrapped scallops in the leftover butter mixture, plate, serve and enjoy!

From Kitchen Wanderings, here's to a life full of flavor!

Sunday, November 4, 2012

Red Dragon : Hot and Spicy Buffalo Wings

There may be several versions as to how this dish came about, but one thing's for sure: it was named after it's place of origin, Buffalo, New York.

As a teenager, there was a year in my life when I couldn't eat chicken wings. Blame it on my doctor telling me to avoid chicken, and when I can't, stick to the white meat so as not to aggravate my asthma or all those rumours that growth hormones are injected in the wing to bulk the chicken up, which may be carcinogenic. Thankfully those days are over. Fried, wings are so flavorful and can reach that "crunchy" cooking time quicker than the other parts.

The blend of garlic, cayenne pepper, butter and honey in the sauce with every bite of that crunchy, tasty coating on the chicken just spells comfort food in my book. Here's my take on this recipe:
tried other brands, but this on
is the best!

Ingredients:
  • 1 kg chicken wings, washed and dried with a paper towel (you may also use drumsticks, but they don't get as crunchy as the wing parts). You may cut the wing into two parts, the flat and the drum, separating it at the joint)
  • 1 c cornstarch (or flour)
  • 2 tbsp garlic powder
  • 1 tbsp black pepper
  • 1 tsp salt
  • 1 tsp celery powder
  • vegetable for deep frying
  • 1/2 c butter
  • 6 tbsp Frank's Original Red Hot Cayenne Pepper Sauce (the one used in Buffalo)
  • 1 tsp black pepper
  • 1/2 tsp salt
  • 1 tbsp honey (or 2 tbsp brown sugar)
  • 1 tsp cayenne pepper (increase if you want your sauce to be hotter)
  • 1 tsp Worcestershire sauce
  • 1 tsp minced garlic
  • celery sticks and ranch or blue cheese dressing
Preparation:
  1. combine flour, garlic powder, black pepper, salt and celery powder
  2. put wings in the bag, seal and shake
  3. deep fry in heated oil or put on a non stick baking pan, greasing the surface and baking the wings til it turns golden brown (20 minutes on 350*F). In frying, you'll know when the chicken's done by sticking  a fork into the meat. If the juices run clear, you're good to go. 
  4. While the chicken's being cooked, melt the butter in a sauce pan and combine it with the pepper sauce, pepper, salt, honey or sugar, cayenne pepper, garlic and Worcestershire sauce. Stir til it simmers.
  5. When your chicken's done, coat it in the sauce.
  6. Plate and serve with celery sticks and ranch or blue cheese dressing on the side. No one in the house likes celery (the veggie) but the flavor's pretty good in small amounts, so I try to incorporate the flavor via celery powder in the chicken and oftentimes, I throw in a tsp in the sauce. 
From Kitchen Wanderings, here's to a life full of flavor!


Sunday, October 28, 2012

Chinaman's Culinary Chance: Stir Fried Butter Garlic Chili Shrimps

Several kinds of hot  and not so hot chilies may be found in the shelves of our kitchen. We heart spice so much that even the younger ones have been seen eating kimchi, wasabi peas and adding Tabasco, XXX hot BBQ sauce and Lee Kum Kee chiu chow oil on everything.

This recipe is my take on "Sichuan Shrimp meets Gambas al  Ajillo".

Ingredients:

  • 12 pcs large white shrimps, peeled, deveined and butterflied but with the heads still intact
  • 1 small onion, chopped
  • 2 tbsp garlic, crushed and minced
  • 4 tbsp butter
  • 1 tsp olive oil
  • 2 tbsp Lee Kum Kee Chiu Chow (chili oil)
  • 1 tbsp crushed red pepper flakes
  • 1 tbsp chopped parsley
  • a pinch of salt
  • 1 tsp chopped parsley
Procedure:
  1. Heat up a wok. You'll know when to put the butter and olive oil when you see steam/smoke rise up from the empty wok. Turn down the heat to medium and put the butter and olive oil (to prevent the butter from burning fast).
  2. Put onions, then garlic and give it a stir.
  3. Throw in the shrimps, stirring it a little to incorporate the onion and garlic flavor.
  4. Season with a pinch of salt, stir once then add the crushed red pepper,  1 tbsp parsley and chili oil
  5. The shrimps are done when you see them turn orange-ish. Don' overcook em. The whole process takes about 5 minutes. Right before plating, sprinkle the remaining chopped parsley.
  6. Serve. Goes well with steamed rice, toasted french bread or any pasta of your choice. Just toss em in!
From Kitchen Wanderings, here's to a life full of flavor! 

Sunday, October 21, 2012

The Hunt For Red Meat: A Veggie Chicken Casserole Recipe

Broccoli is a vegetable I can never seem to cook in the house, at least not without much protest. Oh sure, I sometimes ground it up and mix it in with some minced meat, making it into pork rolls or meat balls, but serving it as it is in all it's green glory just won't take.

I read countless times that putting some cheese on it does make it more palatable. This veggie, that's high in Vitamin C and dietary fiber. It also has anti carcinogenic properties, and many other nutrients that are so good for the body.

Here's a recipe that I managed to put together that also adds protein and calcium to the mix:

Ingredients:

  • 300 grams of broccoli, washed and cut into bite sized pieces. Peel and slice the stalks (if any)
  • 1 large carrot, julienned
  • 200 grams sliced mushrooms
  • 1 Hungarian sausage, sliced
  • 1 Chorizo de Bilbao, sliced
  • 100 grams chicken breast, cubed
  • 1 small onion, sliced
  • 1 tbsp garlic, macerated and chopped
  • 2 tbsp olive oil
  • salt and pepper to taste
  • 1/4 c water (or less)
  • 1 cup mozzarella cheese, sliced
Preparation:
  1. İn a wok or pan, heat up the olive oil. Saute the onions and garlic.
  2. Add the chicken and stır fry til half cooked
  3. Add the chorizo de bilbao followed by the Hungarian sausage.
  4. Toss in the carrots. Stıir.
  5. Add the broccoli and mushrooms. Stir
  6. Add water and contınue cooking til veggies are done.
  7. Put veggies in an oven safe dish. 
  8. Top with cheese slices  and bake under 350 degrees Fahrenheit til cheese melts.
From Kitchen Wanderings, here's to a life full of flavor!

Sunday, October 14, 2012

The Day of the Steamed Fish

Here's a dish I put together under 30 minutes. It's flavorful, tasty, moist and quite filling not to mention nutritious! Great way to add fish into your diet and the kids love it too!

Ingredients:

  • 1 kg white fish fillets, cut into serving sizes
  • aluminum foil, cut into a size big enough to cover your individual fish slices into tidy packages
  • 6 plump juicy tomatoes, washed, seeded and cut into cubes
  • 1 large onion, chopped
  • 1 bundle, scallions, chopped
  • salt and pepper to taste
  • 1 tsp MSG (optional)
  • 1 tsp ginger powder (or about a tbsp of the sliced one), I use powder simply because the folks in our house hate getting a bite of it Ü
  • 1/4 c sesame oil
Preparatıon:
  1. Brush a little sesame oil on the surface of the foil before putting the fish slice on it.
  2. In a bowl, put together all the other ingredients and mix well.
  3. Scoop one or two spoons of the mixture on top of the fish, making sure you get a little of all the ingredients are on the fish.
  4. Wrap fish in the the foil making that the sesame oil or juices of the fish as it is cooked won't escape.
  5. Broıil, bake or steam for about 20 - 30 minutes. 
  6. Serve individually so that each and everyone gets a good amount of the sauce a packet is opened. Goes well with steamed rice.
From Kitchen Wanderings, here's to a life full of flavor!

Sunday, October 7, 2012

The Silence of the Mock Lengua

Aside from our obvious over of sea food, a dish, (even after finding out what it was) that I can't seem to get enough of is lengua estofada. A dish of Spanish origin, the braised beef tongue is one of the most succulent, rich and flavorful dish that can be the highlight of a meal when done properly. This recipe tastes like the real deal.

However, having this can be difficult for two main reasons: 1) someone at the dining table can't for the life of them, swallow tongue (pardon the pun). Then there's 2) when you buy the main ingredient to this dish, you have to buy the tongue whole, which often is way to much tongue if there's only a few of you to savor the dish.

My solution? Mock Lengua:

Ingredients:

  • 1 kg beef kenchi/foreshank
  • 1 medium sized onion, chopped
  • 2 beef cubes
  • 2 tbsp. soy sauce
  • 1/2 red wine, ıf ıt's not good enough to drink, ıt's not good enough to cook with
  • water to cover your meat in the pot
  • 1/2 c butter
  • 3 bay leaves
  • 5 peppercorns
  • 200 grams button mushrooms, fresh or canned
  • 4 tbsp cornstarch, diluted in 1/4 c water
  • salt and pepper to taste
  • 1 small onion, chopped
  • 1 mediım sized tomato, seeded and chopped
Preparation:
  1. Put meat into a pressure cooker, with enough water to barely cover the meat. Add the next 7 ingredients after the beef and cook for about an hour after you hear the pressure cooker start to make that steam induced rocking sound.
  2. When done, set meat aside and about 3 cups of the broth.
  3. In a saucepan, saute onions and tomatoes in a little oil til onions caramelize. Add button mushrooms and stir.
  4. Add the broth. When it starts to simmer, add the diluted cornstarch. Season to taste with salt and pepper and cook til it thickens.
  5. Slice your beef into 1/8 to 1/4 inch and arrange on a platter. Pour a little of the sauce to slightly cover the meat and keep the rest on the side. Goes really well with mashed potatoes!
**you can make gravy instead of the sauce by skipping the sauteing part. Instead, boil the broth and add the diluted cornstarch and mushrooms. Cook til it thickens ans season to taste.
From Kitchen Wanderings, here's to life full of flavor!

Sunday, September 30, 2012

The Talented Mr. Bacon

Bacon is probably the only food in the planet that I could combine with my kids' hatest dish and have them declare that it was good eatin'. This cured pork, though unhealthy, makes a lot of dishes tasty, flavorful and downright delish!

Here's one of the many bacon wrapped dishes that you could easily make at home, the BACON ENOKI SCALLOP!

Ingredients:

  • 250 grams maple bacon, sliced in the middle, vertically
  • 200 grams scallops, shucked and washed. We get ours from the supermarket, ready to cook.
  • 1 bundle or 1 small can enoki mushrooms
  • a pinch of garlic salt
Preparation:
  1. Take a bacon strip and arrange a scallop and some enoki mushrooms on one side. 
  2. From that side slowly roll the bacon strip, making sure the scallops are wrapped. The enoki may stick out.
  3. Put the roll on a non stick pan. 
  4. When all the rolling has been done, and the bacon rolls have been placed on the baking pan, sprinkle a pinch of garlic salt over them.
  5. I used the grill function of our over to cook this. You may use a broiler or grill these but you'll have to secure 'em with a toothpick.
  6. Cook till the bacon is done (see pic above)
For a cocktail party, you may make a variety of these and serve as appetizers:
  • wrap deveined and butterflied prawns along with some asparagus spears, preferably the fresh ones. Brush a little teriyaki sauce before grilling.
  • wrap some chicken liver. Secure with a toothpick. Beat an egg and dip the liver/bacon in that. Coat with flour. Deep fry.
  • wrap some chicken strips and bell pepper slices. Bake, broil or steam
  • The possibilities are endless!!
From Kitchen Wanderings, here's to a life full of flavor!

Sunday, September 23, 2012

The Name of the Sin is Adobong Pusit

Adobo is a Filipino dish of any meat or veggie that's been cooked with vinegar. The dish I'm about to present is a dish served to us in my cousin's home, one that she shares with her mom in law Mrs. Recto (the very same mom of her senator bro-in law). who hails from a Spanish mestiza ancestry.

Prepared by their cook, the dish had that nutty goodness of olive oil, the spice of peppercorns, the clean taste of the sea from the fresh squid and that slight sour flavour of vinegar. I was in squid adobo heaven. Taking what we had that day, I kinda modified the dish into what we normally prepare now at home. Here is our modified Adobong Pusit ala Recto:

Ingredients:

  • 1 kg fresh medium sized squid, washed well in and out and drained
  • 1/4 c native vinegar (white vinegar is also fine)
  • 2 tbsp macerated garlic (x2, one for boiling, the rest for sauteing)
  • 1 tsp salt
  • 1 tsp pepper
  • 1/2 c water
  • 2 large tomatoes, seeded and sliced
  • 1 medium sized onion, chopped
  • 1/2 c olive oil, extra virgin (reduce if you want)
  • 1 tbsp coarsely grounded pepper (I usually put twice the amount)
  • 1 bay leaf
Procedure:
  1. Boil squid in water, vinegar, salt and pepper til squid is tender. Set aside squid and 1/4 c of broth. You can take out the eyes and the membrane, which I don't do.
  2. Heat half of the olive oil and saute onions, followed by garlic. When onion has caramelized and garlic turns into a lighter shade of brown, add the tomatoes, till the juices come out, then add the squid. 
  3. Stir to incorporate the flavors. At this point, the squid may start to come out. Add the bay leaf and the pepper. A tsp of MSG may be add as an optional ingredient. Stir
  4. Add the rest of the olive oil and stir til everything is well incorporated. Cook til it simmers. Turn off heat when olive oil and squid ink has blended and thickened.
  5. Plate, serve and enjoy! Goes well with hot steamed rice.
From Kitchen Wanderings, here's to a life full of flavor!

Sunday, September 16, 2012

The Case of the Vanishing Crab Pasta

Pardon me for all those folks who are trying to keep things Kosher, but once again, I am featuring a dish that is well loved and savoured in our home: the crab pasta.

The combination of the sweet-salty crab meat blended in with the rich, fatty goodness of crab fat, the sweet-tart flavors of sun ripened tomatoes, the heat of crushed red pepper, the complexity of the herbs and spices and the saltiness of the parmesan cheese makes this dish truly flavorful and in all honesty, quite easy to make. It's so good,

found this new product in the supermarket. Great idea for folks who want to
 incorporate more veggies in their diet

Ingredients:
  • 500 grams of flaked crab meat, (supermarket bought) you could opt to buy fresh crabs and flake it yourself by boiling it in a pinch of salt. This ıs definitely NOT the easy way. Canned crab may be used, but it will definitely taste a bit tinny.
  • 1 bottle of taba ng talangka (tiny crab fat) 240 grams - Navarro's is highly recommended and adequately prized, but not easy to find in our city, so I use Marisco's ınstead, which also quite good. The rest of the stuff out there often has cornstarch in it which makes it such a no-no as you lose a bit of the crab fat's flavor.
  • 500 gram pasta pack of your choice, cooked according to package instructions
  • 1/2 c of olive oil, extra virgin - of course!
  • 1 tbsp chopped parsley
  • 1 tbsp crushed red pepper
  • 1/2 tsp thyme
  • 1 head of garlic, macerated and chopped
  • 2 medium sized tomatoes, seeded and sliced
  • 1/4 cup red wine
  • 2 tbsp lemon juice
  • 1 tsp coarsely ground black pepper
  • 1/2 tsp salt 
  • 1 medium sized onion, chopped
pasta cooked al dente, must be thrown in the sauce right after it's been cooked and drained

Preparation:
  1. Heat 2 tbsps of olive oil. Saute onions, followed by the garlic in it. Add crab meat, salt and pepper. Stir.
  2. Add red wine and lemon juice. Stir and cooked uncovered untıl liquid has evaporated.
  3. Add tomatoes, parsley and thyme. Cook until tomato slices are cooked (they look stewed and have shrunk).
  4. Add the rest of the olive oil. Incorporate mixture well. Then  add the crab fat. Stir well til the sauce starts simmering.
  5. Toss in freshly cooked pasta.
  6. Plate. Top with chopped parley, crushed red pepper and parmesan. Enjoy!
From Kitchen Wanderings, here's to a life full of flavor!

Sunday, September 9, 2012

The Pochero Purveyor

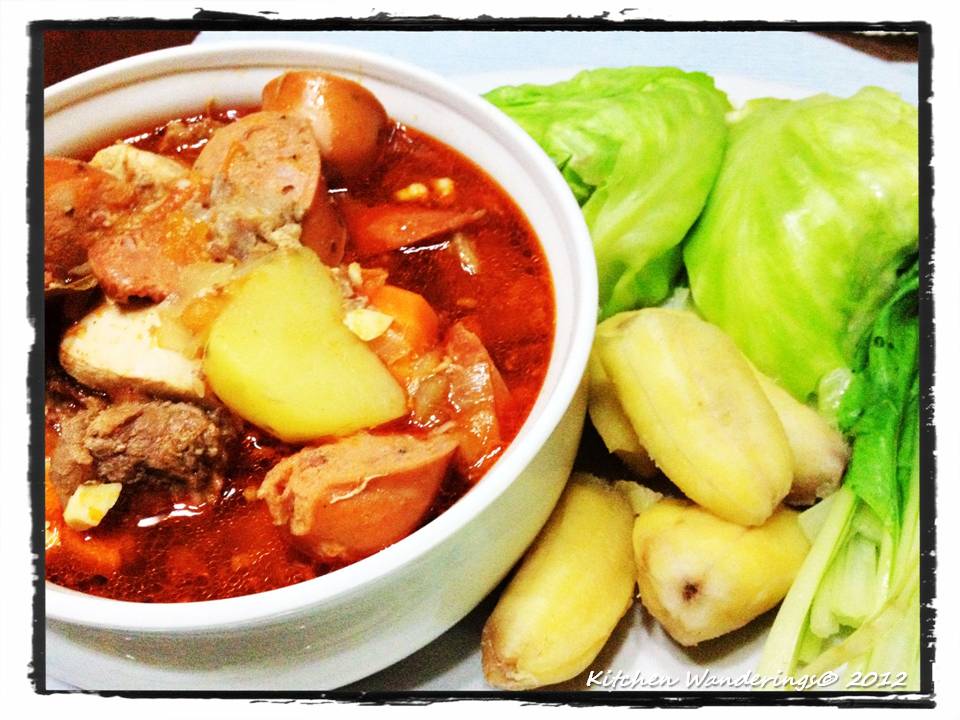
Pochero is another dish best prepared when there are a lot of people to share it with. Doing all the prep work may seem a bit daunting, so I'll be sharing with you some tips and tricks of my own.

By the way, for those who don't know what puchero/pochero is, it's a casserole dish of Spanish influence, that consists of boiled chicken, beef, sausages and veggies. For a family of 6, (of which 5 are male), I make a medium sized pot and rarely have leftovers Ü From start to finish, this would take about an hour and a half to make, but it's all worth it Ü 

Some purists might disagree, but I've got to feed several hungry mouths pronto, that's why the whole "slow cooking of the meats" wasn't used in this recipe.
beef kenchi cubes, assorted sausages,
chicken slices and Spanish paprika
soffritto ingredients: chopped onions, garlic,
peppercorns, bay leaf and tomatoes
plantains (saging na saba), carrots and
potatoes
leafy veggies are good for you Ü

Ingredients:
  • 500 grams beef kenchie (foreshank)
  • 200 grams chicken, cut into bite-sized pieces
  • 3 pieces chorizo de bilbao,  cut into bite-sized pieces
  • 2 pieces of any sausage/s of your choice, (I used Hungarian and some Ground Pepperoni) ,  cut into bite-sized pieces
  • 1/3 c olive oil
  • 1 medium sized onion, chopped
  • 5 big, plump, juicy tomatoes, chopped
  • 1 tbsp garlic, macerated and minced
  • 1 bay leaf
  • 5 peppercorns
  • 2 tbsp Spanish Paprika
  • 200 grams potatoes, cubed
  • 2 pieces medium sized carrots, cubed
  • 1 bundle, pechay tagalog, washed and separated
  • 1 small cabbage, halved
  • 5 pieces saba (plantains), skin removed, and cut in half
  • 10 pieces green beans, cleaned 
  • 2 c broth
  • really goodfish sauce (patis)  to taste **our family's big on endorsing authentic special patis Malabon. The balance of sweet and salty and that wonderful aroma is so good that me and the kids would put a little in our rice, sans any viand and just enjoy the fish sauce.
parboil
good fish sauce is the secret to good pochero
Preparation:
  1. Put your beef (whole) into the pressure cooker. Pressure cooking starts when you hear you cooker make that steam induced rocking sound. Do this for about an hour. You can cut it into cubes after it's been tenderized. While that's goıng on,
  2. Parboil your potatoes, carrots and plantains in the same pot
  3. Parboil your pechay, cabbage and green beans altogether
  4. In a separate saucepan, (after the meat has softened), make a soffritto. Do this by heating up the olive oil and sauteing the onions, garlic, tomatoes, bay leaf and peppercorns. As the tomatoes soften, add the paprika and stir it in to prevent burning.
  5. Throw in the chicken in the soffritto, followed by the sausages, stirring til the chicken is cooked. I personally prefer the breast due to its quick cooking time. When that's done, throw in the beef, making sure that all the meats get a good coating of the soffritto.
  6. Pour in the broth til it boils. Season with salt and pepper, then put in the potatoes, carrots and plantains (I separate these coz the kids want to make sure if they're getting a potato or a plantain :P). Wait for it to boil again and don't freak out if you have this reddish oily thing on top of the broth. That's what you get when your paprika' s good and it blendsin well with the olive oil in the soffritto.
  7. Season with good fish sauce (patis).Personally special patis Malabon rocks our world. If we can't get the real thing, Thai or Vietnamese patis works too.
  8. Arrange the other veggies in a platter before ladling the the broth and its meaty goods in a bowl.  
  9. Serve hot and enjoy!
that oily red stuff is basically your own homemade paprika oil
From Kitchen Wanderings, here's to a life full of flavor!

Sunday, September 2, 2012

Pastel, Por Favor!

Chicken Pastel is a Filipino version of the humble chicken pot pie. As recipes vary , a common denominator of the Filipino variety is the inclusion of chorizo de bilbao in the mix as well as the use of chicken red meat. I prefer to blend both varieties.

Ingredients:

for the PASTEL:

  • 500 grams chicken breasts fillets,cut into cubes 
  • 2 pcs chorizo de bilbao ( perhaps the best brand to buy is El Rey. If you can't find any or don't want to commit to a big can, a regular sized can of Purefoods chorizo works just as well)
  • 1 c vienna sausage (the light blue Libby's vienna sausage has the right texture and flavor)
  • 1 pc carrot, cut into cubes
  • 1 pc potato , cut into cubes
  • 1 c button mushrooms
  • 1/2 c black pitted olives, sliced
  • 2 tbsp soy
  • 3 tbsp lemon or lime juice
  • 1/2 tsp each salt and pepper 
  • 1/4 c butter
  • 1 c broth
  • 2 tbsp flour for thickening
  • 2 hard cooked eggs, sliced

for the PASTRY CRUST:
  • 2 c all purpose flour
  • 1/2 tsp salt
  • 1/4 c butter
  • 1/3 c cooking oil 
  • 3 tbsp water
  • non stick cooking paper
Procedure:
Chicken Pastel:
marinated chicken breast cubes
  1. marinate chicken in soy and lemon juice for about 20 minutes
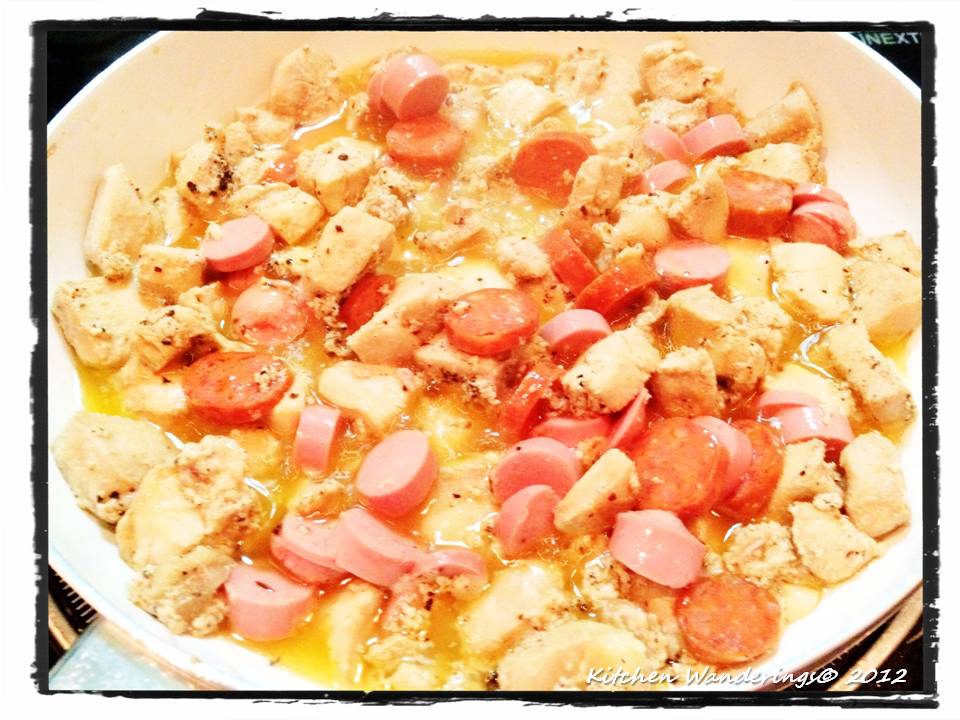
  2. saute chicken cubes in butter, while seasoning the chicken with salt and pepper
  3. add chorizo and Vienna sausage slices followed by the carrots, potatoes, mushrooms and olives
  4. stir everything up to incorporate the butter, the pour broth
  5. cook til potatoes and carrots are done
  6. thicken with flour dissolved in a little water
  7. transfer to an oven proof dish and top with the egg slices
I cut the carrots smaller just so kids
get to eat more of it Ü
saute everything in butter, add a little olive oil
to prevent the butter from burning
arrange everything in an ovenproof dish

Crust:
sift the dry ingredients
  1. sift flour and salt
  2. combine butter and oil
  3. cut in with a pastry blender, sprinkling water as you form dough into a ball
  4. put between two sheets of non stick cooking paper and roll to a 1/4 inch thickness or sightly thinner
  5. take out dough from paper and arrange on top of dish according to how you want it
  6. baked chicken pastel at 400 F for about 40 minutes or until your crust is golden brown
it's a bit tricky :p
prick in some whole with a fork to release
some steam
one side was left neat and the other wasn't
so we could have more of the crust to eat Ü
There really is nothing wrong with taking out the carrots or potatoes or substituting or adding other sausages in the mix. You can even do away with the crust, and the filling will stıll be wonderful!! Whatever makes you happy :)

From Kitchen Wanderings, here's to a life full of flavor!

Sunday, August 26, 2012

Pat-A-Cake, Pat-A-Curry-Fishcake

Mother was quite into food experimentation back in the day. A dish that she picked up from a friend was curried potato cakes. Spicy, savory fried cakes that were great as snacks or as a side dish.

Remembering flavors from that point in time here' s a seafood variation of that vegetarian dish.

Ingredients: (good for 6 healthy eaters)

  • 500 grams fish fillet (skinless)
  • 1 cube S&B Golden Curry (#5 heat)
  • 1 egg
  • 1 medium white onion
  • 1 tsp garlic, minced
  • salt and pepper to taste
  • cornstarch for dusting
  • oil for frying
Procedure:
  1. Put the first 5 ingredients in a food processor and pulse it til everything is well blended. Don't puree.
  2. Transfer to a bowl and season to taste.
  3. Dust your hands with a little cornstarch, while you heat oil in a frying pan.
  4. Form a patty from 2 tbsp of the mix and transfer palm to palm to form a patty.
  5. Fry over medium fire til golden brown.
This goes well with Sriracha Sauce or some guacamole and salsa (see recipe here) on the side.

**Guacamole Recipe:

  1. Half, core and remove skin of one ripe avocado.
  2. Mash with a fork and spoon in about 3 tbsp of our homemade salsa.
  3. Season with salt to taste and enjoy!

From Kitchen Wanderings, here's to a life full of flavor!

Sunday, August 19, 2012

The PAELLAphile


Nothing more speaks to me of a family meal than the sea food paella. This traditional Spanish cuisine of rice, saffron, seafood and chicken has been officially classified as good eats in our home.

This is a recipe I got from my father (who makes the best sea food paella ever, as opposed to my mother, who makes the best arroz valenciana, a chicken paella of sorts). Hope you enjoy it as much as we do:

Ingredients:
This recipe can feed around 8-10 people, so just tweak it to suit your numbers Ü

  • 1 kg mussels, sauteed in a tsp of garlic and onions slices, then boiled. Set aside 1 cup of broth. I prefer to keep some in a shell for presentation purposes, but I do take out most of the mussels from it's shell after cooking. You could also substitute these with clams. 
  • 1/2 kg crabs, boil whole with next ingredient
  • 1/2 kg prawns (shrimps medium-to large are fine too)
  • 1/c squid rings (boiled til tender)
  • 400 grams chicken, breasts (set aside raw) and soup parts (boil and set aside 2 cups broth)
  • 2 pcs chorizo de bilbao, sliced
  • 200 gms bacon or ham, sliced into bite sized pieces
  • 3 tbsp olive oil, preferably extra virgin
  • 1 medium onion, chopped finely
  • 2 tbsp garlic, minced
  • 1 c tomato sauce
  • 2 c rice, washed 
  • 3 c broth (from the ones saved above)
  • 2 pcs bell pepper, one red, one green, cut into strips
  • 1 egg, hard boiled for garnish
  • lemon or lime slices
  • salt
  • 2 tsp saffron (this tends to be optional for us as the sea food's flavors are often more than enough)
  • 1/2 c peas (which I don't put as no one really likes these except for me)
Procedure:
Before anything else, make sure you have a heavy pan to cook this with. If you don't have a heavy cast iron pan (or a paellarahan), the next best thing is trying to cook this in a pressure cooker's bottom half or something equally thick.

Most of the prep work has been indicated above. That' basically most of the work for this dish. Putting it all together doesn't take that much time.
  • Start off by frying the chicken breasts, chorizo and bacon or ham (or both!) in the olive oil. 
  • Push to one side and saute the garlic and onions together with the tomato sauce.
  • Add broth and rice and mix everything else in the pan together
  • Season with salt and cover to cook rice. **note: not all rice is created equal. some may require more water or less water. I'd put 2 1/2 c broth first, then add as I cook the rice to make sure the texture isn't too hard or too mushy. Cook til all the broth is absorbed.
  • During the last 5 minutes of cooking, stir in the mussels and squid. Then top it with the crab and shrimps. I would cut up some of the crab in half and some of the shrimp to mix in with the rice and leave some for garnish.
  • Stir in the saffron, if any, at this point as well as the bell peppers. Save some bell  pepper for garnish too.
  • When all done, garnish with egg and lemon slices as well (see pic above).
  • The main thing you have to watch for in paella making is ensuring that none of the seafood is overcooked and that the rice is cooked to the right consistency.
From Kitchen Wanderings, here's to a life full of flavor!